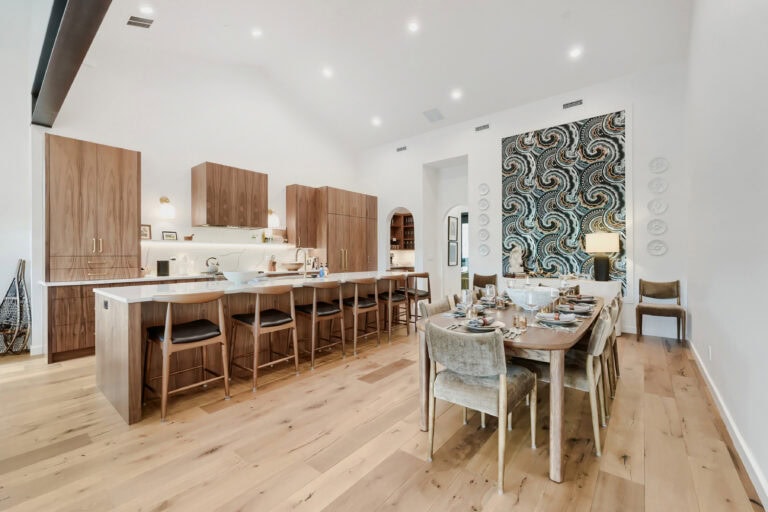
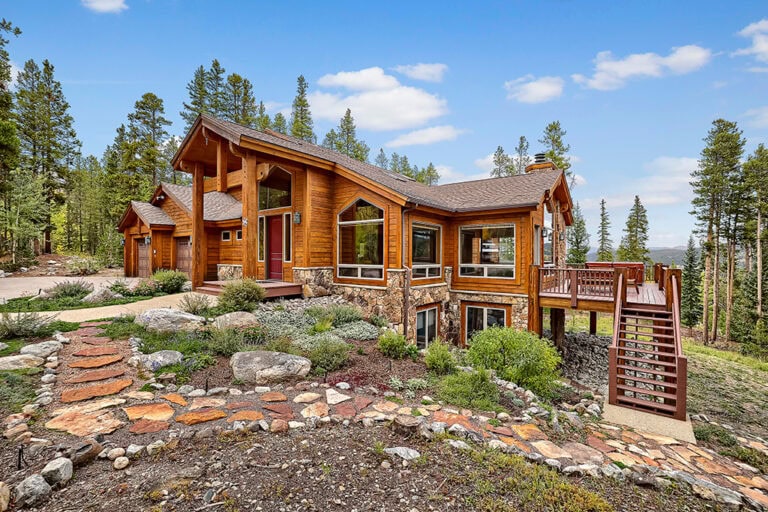
Even experienced real estate photographers frequently fall into common technical and operational traps—including uncalibrated lighting, wide-angle distortion, blown-out windows, and over-processing—that compromise image clarity and distort spatial relationships. This comprehensive guide covers the top real estate photography mistakes, how professionals resolve them using industry-tested techniques, and how you can scale your photography business seamlessly.
Quick summary: Real estate photography pitfalls and solutions
Because precision and quality dictate profit in real estate media, avoiding these errors is essential to capturing buyer interest. According to NAR reports, 81% of buyers consider listing photos the most vital element when assessing a property, and listings with professional media receive up to 118% more online views.
| Mistake | Core issue | Professional fix |
|---|---|---|
| 1. Uncalibrated lighting | Mixed bulb and daylight temperatures causing muddy color casts | Use Auto Exposure Bracketing (AEB) to blend highlight and shadow frames. |
| 2. Lens distortion | Curved walls or warped proportions from incorrect focal lengths | Shoot with a 16–24mm wide-angle zoom lens on a leveled tripod at 4–4.5 ft. |
| 3. Window blowouts | Overexposed, pure-white windows that hide exterior views | Blend bracketed AEB exposures or capture a dedicated window pull shot. |
| 4. Unintentional reflections | Gear or photographer visible in mirrors, glass, and appliances | Shoot 10–15° off-center and trigger the camera with a cable shutter release. |
| 5. Over-processing images | Unnatural HDR halos, muddy contrast, and oversaturated colors | Choose natural, true-to-life image engineering over heavy automated filters. |
| 6. Misaligned verticals (keystoning) | Walls leaning inward or outward from camera tilt | Level the camera on-site with a virtual horizon and refine with geometry tools. |
| 7. Neglecting add-on media | Offering only stills, limiting revenue and listing appeal | Bundle 2D/3D floor plans, aerial drone media, and virtual tours. |
Casual property snapshots might suffice for lower-tier listings. However, mastering these technical standards protects your brand integrity. It also drives buyer engagement and secures lucrative repeat business from top listing agents.
1. Uncalibrated interior lighting and mixed color temperatures
What is the mistake?
Standard listing preparation calls for turning on all interior lights to make a home look bright and welcoming. However, this can introduce two conflicting light sources: the warm, yellow-orange glow from interior lightbulbs and the cool, blue daylight pouring through windows. If you fail to calibrate for both, the clash creates distracting, muddy color casts across ceilings, walls, and cabinetry that make listings look amateurish.
How to avoid it:
A strong option to correct imbalances is to capture a full exposure spectrum with Auto Exposure Bracket (AEB). Auto Exposure Bracketing automatically takes consecutive photos at different brightness levels—from very dark to very bright—with one click. Setting your camera to AEB ensures the darkest frame preserves rich outdoor window views while the brightest frame illuminates dark corners and cabinetry. You can then allowing edit software to blend them into one naturally balanced image.
2. Using incorrect focal lengths and wide-angle distortion
What is the mistake?
Using an extreme ultra-wide fisheye lens can bend straight doorframes, stretches furniture along the edges of the frame, and creates an unrealistic, funhouse-mirror impression of room sizes. Conversely, using a standard portrait lens cannot always capture enough of the room to convey how spaces connect.
How to avoid it:
- Shoot with a wide-angle zoom lens rather than prime lenses: Keep your focal length between 16mm and 24mm on a full-frame camera sensor (or roughly 10mm to 16mm on an APS-C crop sensor) to capture full room context without curved walls. Wide-angle zoom lenses let you adjust your framing on the spot, unlike fixed prime lenses that trap you in tight spaces like half-baths where you cannot step backward through a wall.
- Mount your camera on a sturdy tripod with an adjustable ball head: Real estate brackets require slow shutter speeds that will blur if held by hand. Using a sturdy tripod with an adjustable ball head allows you to rotate and level your camera precisely on every axis and lock it securely in place.
- Position your camera between 4 and 4.5 feet off the floor: Setting your tripod at waist-to-chest height splits the perspective evenly between the ceiling and floor, showing countertops, tables, and flooring naturally without tilting the lens.
3. Window blowouts and poor dynamic range control
What is the mistake?
The human eye adjusts effortlessly between a dim bedroom and a sunny backyard, but camera sensors cannot capture both extremes in a single shot. Exposing your camera strictly for the inside of a room causes the windows to “blow out”—turning into blinding, pure white blocks that completely erase backyard landscaping, mountain views, or patio decks that sell the property.
How to avoid it:
- Blend bracketed exposures in post-production: Capturing a series of bracketed exposures using AEB captures the entire dynamic range of the scene. Post-production blending merges the darkest frame (which contains crisp window views) with your balanced interior frames to reveal both inside details and exterior landscapes clearly.
- Perform a dedicated “window pull” shot: A window pull is an extra photo captured specifically to expose the exterior scene outside the glass by using a faster shutter speed or firing flash directly at the window frame. In photo editing software, you simply paint or mask this clear window view directly over the blown-out window in your main interior image.
4. Unintentional reflections in glass, mirrors, and appliances
What is the mistake?
Nothing looks less professional than seeing the photographer’s silhouette, tripod legs, or flash gear reflected in bathroom vanity mirrors, glass shower enclosures, stainless steel refrigerators, or patio doors.
How to avoid it:
- Angle your perspective 10 to 15 degrees off-center: Never photograph mirrors, polished appliances, or glass patio doors head-on. Stepping slightly to the side preserves the depth of the room while bouncing your camera’s reflection harmlessly off-frame.
- Trigger your camera remotely with a cable shutter release: A cable shutter release connects to your camera so you can take the shot without pressing the shutter button directly. Step around a corner or outside the room’s line of sight before triggering the shutter to eliminate your reflection and avoid camera shake.
5. Over-processing and excessive unnatural HDR
What is the mistake?
HDR (High Dynamic Range) blends dark and light photos together. However, relying on heavy-handed automated presets or phone filters can produce an unnatural, cartoonish look: glowing white “halos” along the edges of dark cabinets, gray or muddy ceilings, and oversaturated neon greens and blues. Over-processed images turn off buyers and can violate MLS truth-in-advertising guidelines.
How to avoid it:
- Prioritize natural, true-to-life editing: Real estate photos should look crisp, clean, and authentic to what prospective buyers will see in person during an open house.
- Rely on professional image engineering over uncalibrated automation: Move away from one-click automated filters in favor of dedicated post-production specialists who hand-balance highlights, neutralize mixed color temperatures, and correct vertical alignment to deliver consistent magazine-quality results.
6. Falling for vertical alignment errors (keystoning)
What is the mistake?
Have you ever seen a listing photo where the walls appear to lean inward or outward like a pyramid? This is called keystoning. It happens whenever your camera tilts upward (to capture more ceiling) or downward (to capture more floor). When vertical lines aren’t parallel, rooms look crooked, cramped, and visually jarring to buyers scrolling through listing portals.
How to avoid it:
- Level your camera along all three axes on-site: Turn on your camera’s built-in electronic virtual horizon or check the bubble level on your tripod head before pressing the shutter. Keeping the camera completely flat and aimed straight ahead ensures all vertical doorframes and wall corners stay straight.
- Correct remaining perspective distortion in editing: If working in an exceptionally cramped space forces a slight tilt, use the geometry and perspective correction sliders in your photo editing software to snap all vertical lines back to a clean 90-degree angle before delivering proofs.
7. Limiting services to basic 2D still photography
What is the mistake?
Offering only traditional still photography limits your earning potential per shoot and makes it harder to compete against full-service media creators. Today, over 70% of home sellers prefer listing agents who provide interactive visual media, including 3D virtual tours and aerial views.
How to avoid it:
- Provide 2D and 3D schematic floor plans: Floor plans help buyers visualize property flow, room proportions, and layout, making your media package significantly more attractive to listing agents.
- Obtain an FAA Part 107 commercial drone license and insurance: Adding aerial drone photography lets you capture elevated perspectives, property boundaries, acreage, and neighborhood amenities that ground-level cameras cannot reach.
- Deliver multi-resolution files through a simple client portal: Supply agents with an intuitive download link containing both high-resolution files for print marketing and MLS-optimized images alongside interactive tour links.
Common mistakes listing agents make (and how photographers can guide them)
Even when your camera settings and framing are technically flawless, shoot quality often hinges on on-site property conditions. Real estate agents frequently make assumptions about the photography process that eat into appointment windows and compromise final assets.
Understanding these friction points allows you to position yourself as an authoritative partner who proactively consults rather than just taking photos:
1. Skipping pre-shoot staging and property prep
Agents often assume photographers will physically move furniture, declutter kitchen counters, or hide trash cans, but professionals shoot properties strictly as-is to preserve schedule integrity and focus on technical framing. Provide your clients with a comprehensive residential pre-shoot checklist 24 to 48 hours prior to the appointment so sellers can turn on all lights, twist blinds open, stow personal items, hide pet gear, remove cars from driveways, and sweep walkways before you arrive.
2. Scheduling without regard to solar orientation
Booking an exterior shoot when the sun is directly behind the property leaves the front facade in heavy shadow, while harsh midday sun washes out curb appeal. Advise your agents on optimal timing based on facade orientation (morning for east-facing homes and late afternoon for west-facing properties) or upsell dedicated twilight photography sessions.
3. Requesting unrealistic or non-compliant edits
Agents occasionally ask photographers to digitally remove permanent fixtures such as utility poles, neighboring homes, or power lines, which violates MLS compliance rules. Educate agents that professional editing covers exposure balancing, sky replacements, and lawn greening, but altering permanent structures creates serious legal liability.
4. Underestimating floor plans and immersive media
Some agents attempt to cut marketing costs by ordering only standard stills for sprawling or complex architectural layouts, leaving buyers confused about flow and scale. Share listing performance metrics demonstrating that listings with floor plans and 3D walkthroughs generate higher qualified buyer inquiries to encourage comprehensive media bundles.
Scale your real estate photography business with Virtuance
Avoiding technical mistakes is only half the battle—managing editing turnaround, client scheduling, billing, and business growth is where many talented photographers hit a ceiling.
When you join the Virtuance Photography Network, you focus on what you do best: capturing exceptional spaces. We manage client acquisition, scheduling, billing, and client care. Behind every shoot, our in-house editors and dedicated quality assurance teams engineer images to ensure maximum visual performance and unmatched brand consistency across every market.
Ready to elevate your photography career and focus on shooting? View our current photographer opportunties and apply to become a Virtuance Photography Partner today!
FAQ
Is HDR better than flash for real estate photography?
Both techniques have advantages. Bracketed HDR allows for faster shooting on-site and natural light blending, while off-camera flash offers superior color accuracy and eliminates unwanted color casts. Many top professionals combine both approaches or partner with dedicated real estate media post-production teams that balance ambient bracketed frames with precision color correction.
How should photographers handle unprepared properties when arriving on-site?
Professional real estate photographers shoot properties as-is to preserve schedule integrity and focus on technical framing. Send a residential pre-shoot checklist 24–48 hours prior to arrival. If a property remains unprepared when you arrive, document the home’s condition, notify the listing agent immediately, and focus on capturing ready spaces rather than spending shoot time performing housekeeping.